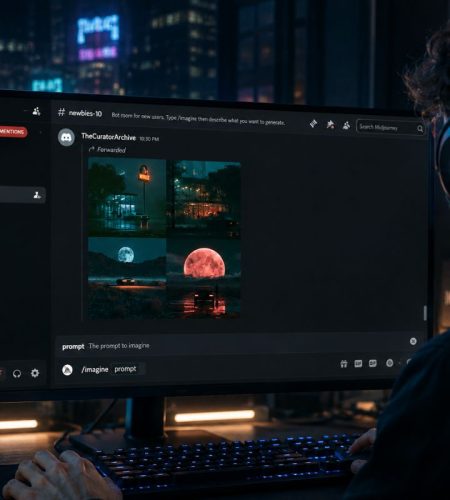
Creating the same character across multiple Midjourney images can be surprisingly difficult. A character may have the right hairstyle in one image but a different face in the next. Clothing, accessories, proportions, and even small facial details can also change between generations.
The good news is that Midjourney provides reference features that make character consistency much easier. The key is to start with a strong reference image, keep the character description stable, and change the scene rather than constantly redefining the character.
This workflow is useful for creating characters for stories, comics, games, social media artwork, or even a consistent set of profile pictures.
Before starting, users may also want to review midjourney pricing and choose a subscription plan that provides enough generation time for testing multiple character variations.
Start With a Strong Character Reference
Your reference image is the foundation of the entire process.
Choose an image where the character is easy to recognize. A clear portrait or full-body image with good lighting is usually more useful than a complicated scene.
Try to establish a few recognizable features:
- Hair style and color
- Face shape
- Skin tone
- Eye color
- Glasses or other accessories
- Clothing
- Distinctive marks or details
- General body proportions
Avoid starting with an image containing several people, heavy motion blur, extreme shadows, or a face that is mostly hidden.
The better the initial reference, the easier it is to maintain a recognizable character later.
Use Omni Reference for Current V7 Workflows
Midjourney’s reference system has changed over time.
For Version 7, Omni Reference is the relevant feature for carrying a character or other subject from a reference image into a new creation. Midjourney’s documentation specifically notes that Omni Reference replaces Character Reference in V7.
On the Midjourney website, you can add your image to the Omni Reference section and then describe the new scene in your prompt.
For Discord users, Midjourney supports the --oref parameter followed by an image URL. Only one image can be used as an Omni Reference.
The basic workflow is:
- Create or choose your character reference.
- Add the image as an Omni Reference.
- Describe the new scene.
- Generate several results.
- Compare the character against the original reference.
- Keep the strongest results and refine the prompt if necessary.
Older tutorials may still mention --cref. That feature remains relevant for compatible older versions, but it should not be treated as the current V7 workflow.
Describe the Character Clearly
A reference image helps Midjourney understand the character, but your text prompt still matters.
Instead of simply writing:
Put this character in a cafe.
Give Midjourney information about the character and the new scene:
Young woman with short silver hair, round glasses, dark green coat and red scarf, sitting inside a quiet mountain cafe, warm window light, cinematic illustration.
Midjourney recommends combining reference images with descriptive text because the prompt provides information about the scene and details that may not be obvious from the reference.
The important part is to keep the identity-related description consistent.
If the character always has silver hair, round glasses, a green coat, and a red scarf, don’t randomly change those details between prompts unless you intentionally want the character to look different.
Keep Character Details Stable
One of the easiest ways to create visual drift is to constantly rewrite the character.
Instead, create a short character description that you can reuse.
For example:
Young woman, short silver hair, blue eyes, round glasses, dark green coat, red scarf.
Then change only the scene:
Scene 1
Young woman, short silver hair, blue eyes, round glasses, dark green coat, red scarf, walking through a rainy Tokyo street at night.
Scene 2
Young woman, short silver hair, blue eyes, round glasses, dark green coat, red scarf, sitting inside a quiet library, warm afternoon sunlight.
Scene 3
Young woman, short silver hair, blue eyes, round glasses, dark green coat, red scarf, standing on a snowy mountain, cinematic winter lighting.
The character description remains stable while the environment changes.
This makes it much easier to build a series of images around the same character.
Don’t Build Every New Image From the Previous One
It can be tempting to take your latest successful generation and use that as the reference for the next image.
That can work, but it can also introduce reference drift.
Small differences can accumulate:
- Hair becomes slightly different.
- Face shape changes.
- Clothing details disappear.
- Accessories are replaced.
- Character proportions shift.
After several generations, the character may look noticeably different from the original.
Whenever possible, keep the original master reference and use it repeatedly instead of creating a chain where every new image becomes the reference for the next one.
Create a Character Sheet
If you are planning to create many images of the same character, make a character sheet first.
A useful character sheet can show:
- Front-facing portrait
- Full-body appearance
- Hairstyle
- Clothing
- Important accessories
- Neutral expression
- General proportions
The goal is to establish the character’s visual identity before creating dozens of different scenes.
You don’t need to generate every possible pose. The important thing is to create a reliable visual reference that you can return to whenever the character starts looking inconsistent.
Separate Character Identity From the Scene
Think about your prompt as having two parts.
Character identity
This should remain relatively stable.
Scene description
This is where you experiment.
For example:
Young man with messy black hair, amber eyes, black hoodie and silver headphones.
That is the identity.
Then you can add:
sitting in a gaming room with neon lighting.
Or:
walking through a futuristic city at night.
Or:
standing on a football field during sunset.
This approach gives you much more control than changing the entire prompt every time.
Use Style References for Visual Consistency
Character consistency and style consistency are not exactly the same thing.
You may successfully recreate the same character but still get noticeably different artistic styles between images.
Midjourney’s Style Reference feature can help with this. It is designed to capture the visual feel of an image, including elements such as colors, textures, lighting, and overall artistic direction.
This can be particularly useful if you’re creating a series where every image needs to feel like it belongs to the same project.
For example, you could maintain:
Character reference: keeps the character recognizable.
Style reference: keeps the artwork visually consistent.
Text prompt: controls the new scene.
That combination can be useful for comics, story illustrations, game concepts, or a series of social media graphics.
Keep Your Prompts Repeatable
Once you find a prompt structure that works, save it.
You don’t need to copy an enormous prompt every time. A simple template is often enough:
[Character description], [action], [location], [lighting], [camera angle], [visual style]
For example:
Young woman with short silver hair, blue eyes, round glasses, dark green coat and red scarf, reading a book, quiet library, warm window light, medium portrait, detailed digital illustration.
Then you can change the action and location while keeping the character information intact.
Midjourney also supports image prompts, Style References, and Omni References, so you can combine different types of visual guidance depending on the result you want.
Don’t Expect Perfect Copies
Even with a strong reference, Midjourney does not guarantee a pixel-perfect reproduction of the same character.
Small details can still change.
Midjourney specifically notes that details such as freckles, logos, and other intricate features may not reproduce exactly from a reference.
This is especially noticeable when you change:
- Camera angle
- Lighting
- Clothing
- Facial expression
- Pose
- Distance from the character
- Art style
The goal should therefore be recognizable consistency, not identical pixels.
The character should look like the same person across the images even if every individual detail isn’t perfectly identical.
Generate Several Versions
Don’t judge character consistency from a single generation.
Create multiple variations and compare them side by side.
Look at:
- Face shape
- Hair
- Eyes
- Clothing
- Accessories
- Body proportions
- Overall silhouette
If three or four generations all look like the same character, your workflow is probably working well.
If the face changes dramatically between generations, strengthen the character description and experiment with the reference settings.
For V7, Omni Reference also includes an Omni Reference Weight (--ow) that controls how strongly the reference influences the result. Midjourney currently documents a default weight of 100 and allows values from 1 to 1,000.
Keep Your Production Settings Consistent
When creating a large collection of images, consistency is easier if your workflow is repeatable.
Try to keep the following stable when possible:
- Midjourney version
- Character reference
- Main character description
- Art direction
- Aspect ratio
- Important visual characteristics
Midjourney’s current documentation shows that different versions support different features, so changing versions halfway through a project can affect your results.
Save successful prompts and references rather than trying to recreate them from memory later.
Creating Consistent Characters for Discord PFPs
This workflow can also be useful if you’re creating a set of Discord profile pictures.
For example, you could create one original character and generate different versions with different expressions, outfits, backgrounds, or themes.
A character that works well as an avatar can then be adapted into an anime PFP, gaming PFP, matching PFP, or other profile style.
If you’re looking for inspiration before generating your own character, you can browse AI PFPs on PfpFinder and explore the wider PFP collections on PfpFinder.
You can also use the finished character as the basis for a custom Discord avatar with our guide on how to make your own Discord PFP with AI.
For couples or groups, the same idea can be used to develop characters that share a visual style. You can then explore matching PFPs for additional inspiration.
A Simple Workflow That Works
If you don’t want to overcomplicate the process, follow this workflow:
1. Create one strong reference.
Make sure the character is clearly visible and has recognizable features.
2. Write down the important characteristics.
Keep the hairstyle, face, clothing, colors, and accessories consistent.
3. Use the appropriate Midjourney reference feature.
For V7, use Omni Reference rather than relying on older Character Reference tutorials.
4. Keep your character description stable.
Change the scene rather than completely rewriting the character.
5. Generate several versions.
Compare them against the original reference.
6. Save successful prompts.
This makes future generations easier to reproduce.
7. Correct major inconsistencies.
If a character starts drifting, return to the original reference instead of continuing from an increasingly different image.
Final Thoughts
Creating consistent characters in Midjourney is less about finding one perfect prompt and more about building a repeatable workflow.
Start with a strong reference image, keep the character’s defining features consistent, use the appropriate reference system for your Midjourney version, and separate character identity from the scene you want to create.
For current V7 workflows, Omni Reference is the key feature for carrying a character into new scenes, while Style Reference can help maintain a consistent visual direction.
You should still expect some variation. Midjourney is generating new images rather than using a fixed 3D character model, so small differences are normal.
The best results usually come from treating the first character image as a master reference, experimenting with new scenes around it, and comparing every generation before using it in your final project.
Related Resources
- Discord PFPs – Find a new profile picture.
- Make a Discord PFP With AI – Create your own AI avatar.
- Discord Bio Ideas – Find ideas for your bio.
- Discord Profile Picture Size – Check the right PFP dimensions.
- Discord Timestamp Generator – Create timestamps for matches and events.
Comments